Orientation
This demonstration lets children investigate whether a plain cardboard box can keep heat inside. By placing a low‑wattage light bulb inside a sealed box, we create a controllable heat source. Measuring the temperature rise while the bulb is on, and the subsequent cooling when it is switched off, shows how quickly heat moves through the cardboard walls. The activity is safe, inexpensive, and works with everyday household items.
Before You Begin
- Adult supervision: An adult should handle the light‑bulb socket, wiring, and any cutting of cardboard.
- Workspace: Use a sturdy table, a flat surface, and keep the area free of flammable clutter.
- Safety: The bulb used should be 25 W or less to avoid overheating. Do not leave the bulb unattended while powered.
- Timing: The hands‑on build takes about 15 minutes. Heating and cooling observations each last 5–10 minutes.
Materials
| Item | Quantity / Size |
|---|---|
| Cardboard box | Medium‑size shoe‑box or similar (≈30 cm × 20 cm × 10 cm) |
| Paper (optional) | Sheet of printer paper for lining the interior (optional) |
| 25 W incandescent or LED bulb | 1 bulb with socket |
| Light‑bulb socket with switch | 1 (plug‑in type works well) |
| Tape (mask or packing) | Enough to seal seams |
| Hot‑glue gun (optional) | 1 |
| Thermometer or digital temperature probe | 1 (range 0 °C–100 °C) |
| Ruler | 1 (for measuring box dimensions) |
| Stopwatch or phone timer | 1 |
All items are commonly found at home or in a school supply cupboard.
Steps
- Prepare the box: Close the lid and tape all seams so air does not leak through obvious gaps. If you wish to test the effect of an interior lining, tape a sheet of paper to the inside walls now.
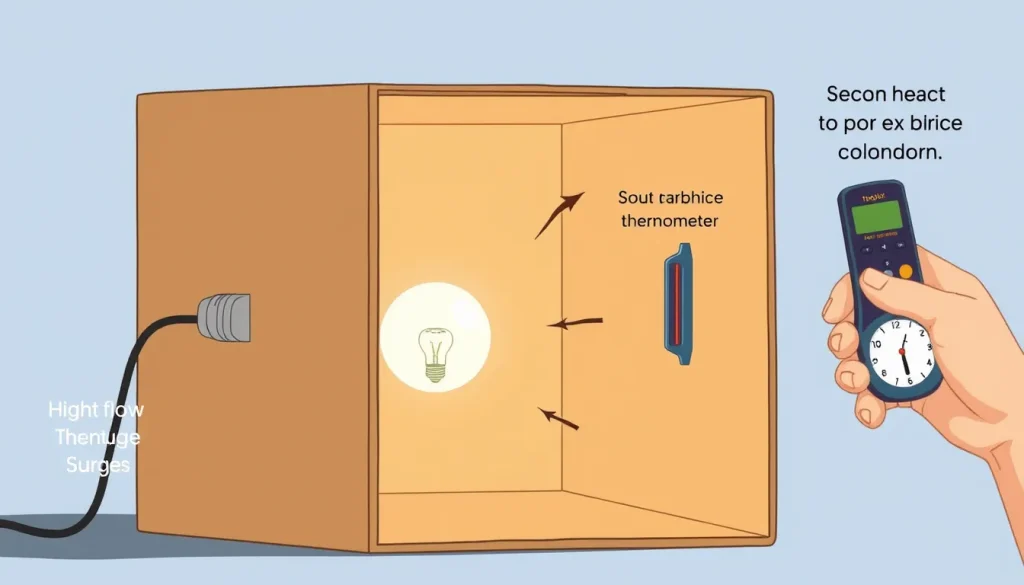
- Cut a hole for the socket: Using scissors or a utility knife, cut a 2‑cm square near the center of one side of the box. The hole should be just large enough for the socket’s wires to pass through without tearing the cardboard.
- Install the socket: Thread the socket wires through the hole, position the socket so the bulb will sit roughly in the middle of the box, and secure it with tape or a dab of hot‑glue. Make sure the socket’s switch is accessible from outside the box.
- Insert the bulb: Screw the 25 W bulb into the socket. Do not turn it on yet.
- Place the thermometer: Position the thermometer probe on the interior wall opposite the bulb, or tape a small digital probe to the inside surface. Record the initial temperature (room temperature).
- Start heating: Turn the bulb on. Start the timer and record the temperature every minute for 5–7 minutes, or until the reading stops rising noticeably.
- Turn off the bulb: After the heating period, switch the bulb off. Continue recording the temperature every minute for another 5–10 minutes as the box cools.
- Repeat (optional): If you have extra cardboard, build a second box with an added layer of paper or another material (e.g., aluminum foil). Perform the same heating‑cooling sequence and compare the curves.
What to Observe or Measure
- Temperature rise: Note how many degrees the interior temperature increases each minute while the bulb is on.
- Maximum temperature: Record the highest temperature reached before the rise slows.
- Cooling rate: After the bulb is off, calculate how many degrees the temperature drops per minute.
- Comparison: If you built a second box with a different interior lining, compare the heating and cooling rates to see which configuration retains heat better.
Plotting the data on a simple line graph (time on the horizontal axis, temperature on the vertical) helps visualise the differences.
The Science Explained
Heat moves from a warmer region to a cooler one by three mechanisms:

- Conduction – direct transfer through solid material. Cardboard is made of thin, air‑filled fibers; the trapped air reduces the number of solid pathways, making cardboard a poorer conductor than metal.
- Convection – movement of fluid (air) that carries heat. Inside the sealed box, air can circulate only slowly, limiting convective heat loss.
- Radiation – emission of infrared energy. All objects radiate heat, but a thin cardboard wall lets most infrared radiation pass through, so radiation is the dominant loss path for a simple box.
Engineers describe an insulating material’s ability to resist heat flow with the symbol R (thermal resistance). The heat‑flow equation used in many classroom labs is:
Q = frac{Delta T times A}{R}
where Q is the rate of heat transfer, ΔT the temperature difference, A the surface area, and R the material’s resistance. A higher R value means less heat gets through. Cardboard’s R is modest (about 0.07 (m·K)/W per centimeter thickness) but still higher than that of thin metal, which is why it slows heating and cooling compared with an uncovered box.[1]
By measuring how fast the temperature rises and falls, children see a real‑world illustration of thermal resistance. If the box with paper lining heats up more slowly or cools more slowly, the added paper increases the overall R value, demonstrating how multiple layers improve insulation.
Troubleshooting
- Bulb flickers or burns out quickly – Check that the socket is firmly connected and that the bulb rating does not exceed 25 W.
- Temperature does not change – Ensure the box is sealed well; large gaps let air flow and equalise temperature rapidly.
- Thermometer reads erratically – Allow the probe to equilibrate for a minute before starting the timer, and keep the probe away from direct contact with the bulb.
- Box deforms from heat – Use a sturdy corrugated box and limit heating time to 7 minutes to avoid warping.
Try Another Version
After the basic demonstration, families can explore variations:
- Different materials: Replace cardboard with a thin wooden box, a plastic container, or a foam cooler and repeat the test.
- Layered insulation: Add a layer of aluminum foil, bubble wrap, or fabric between the cardboard walls and compare the curves.
- Change the heat source: Use a small candle (under adult supervision) or a battery‑powered heating pad to see how source intensity influences the results.
Each modification provides a new question about “Which combination keeps heat in the longest?” and encourages children to think like engineers.
Cleanup and Disposal
- Turn off and unplug the socket. Allow the bulb to cool before handling.
- Recycle the cardboard box if it is still in good condition; otherwise place it in the general waste stream.
- Dispose of the used light bulb according to local regulations (many municipalities accept incandescent bulbs with regular trash, while LEDs may be recyclable).
- Store the thermometer and any reusable tools for future projects.
Related terms
- Insulation
- A material’s ability to slow the flow of heat from a warm area to a cooler one.
- Conduction
- Transfer of heat through direct contact of molecules in a solid or liquid.
- Convection
- Heat transfer caused by the movement of fluid (air or liquid) that carries warm particles away from a source.
- Radiation
- Emission of energy as electromagnetic waves, which can travel through empty space.
Sources & references
- Teach Engineering – Keep the Heat In! Testing the Insulation Properties of Materials, https://www.teachengineering.org/activities/uoh-2668-keep-heat-in-insulation-materials-activity
- Boston University – Heat Transfer Lab PDF, https://www.bu.edu/gk12/mikes/heat_files/heat_lab.pdf
- Science at Home – Cold Stuff! (Heat Transfer/Insulation Lab) YouTube, https://www.youtube.com/watch?v=HmuByL_B43o
- Science Kids – Keeping Warm Activity, https://www.sciencekids.co.nz/gamesactivities/keepingwarm.html