Overview
This demonstration lets children build two classic meteorological tools – a weather vane for wind direction and a cup anemometer for wind speed – using everyday household items. The activity is suitable for ages 6‑14, requires only basic cutting and taping skills, and provides immediate visual feedback about the wind outside.
Before You Begin
- Choose a calm, dry day for the initial test, then try the devices in breezier conditions.
- Set up a stable, level surface outdoors where the vane can spin freely (a garden table, a sturdy cardboard base, or a flat rock works).
- Adult supervision is needed for cutting, handling pushpins, and using scissors safely.
- Gather all materials before starting so the construction can proceed without interruption.
Materials
- Cardboard (a sheet about 20 cm × 20 cm)
- Two straight plastic straws (≈15 cm long each)
- Four small paper cups (e.g., disposable drinking cups)
- Two pencils with eraser ends
- Pushpins or drawing pins
- Clear adhesive tape
- Scissors
- Ruler (10 cm increments)
- Permanent marker (for labeling cardinal points)
- Stopwatch or a phone timer
Step‑by‑Step Procedure
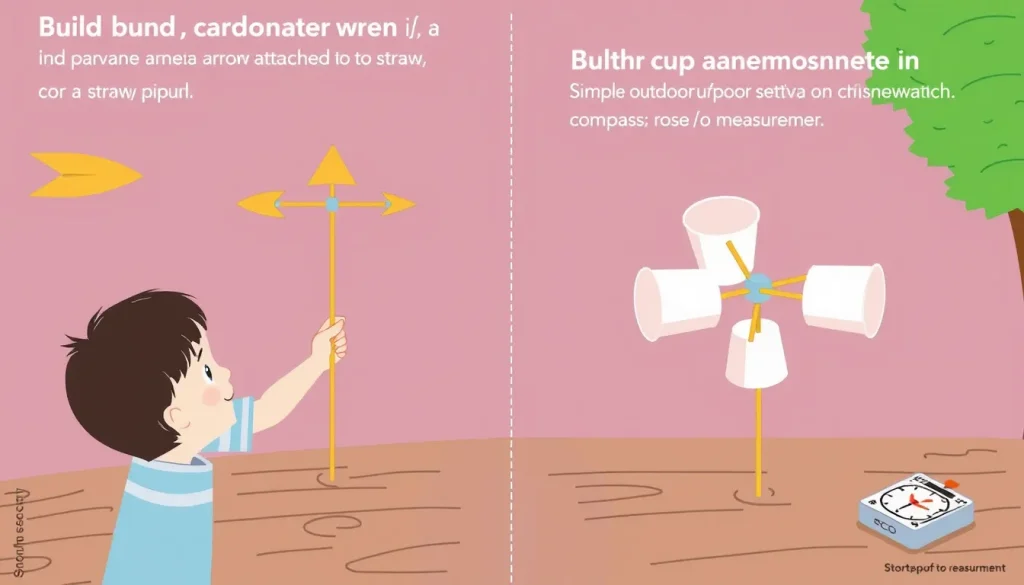
- Cut the vane arrow. Using scissors, cut a triangular arrow about 10 cm long from the cardboard. One side should be broader (the “tail”) and the opposite side pointed (the “head”).
- Attach the arrow to a straw. Tape the arrow to the midpoint of one straw so the straw balances horizontally. The arrow should be able to spin around the straw’s axis.
- Create the pivot. Push a pushpin through the centre of the straw (through the taped arrow) and insert the pin into the eraser of a pencil. The straw should rotate freely without wobbling.
- Make the anemometer cross. Lay the second straw across the first, forming a plus‑sign (+). Tape the two straws together at their crossing point.
- Attach the cups. Tape a paper cup to each end of the crossed straws, making sure all cup openings face the same rotational direction (e.g., clockwise). The cups act as “spokes” that catch the wind.
- Mount the anemometer. Push another pushpin through the centre of the crossed‑straw assembly and secure it in the eraser of the second pencil, perpendicular to the first pivot. This creates a second, independent rotating axis.
- Label cardinal directions. Using the marker, write N, E, S, W on the cardboard base around the pivot point or on a separate piece of cardboard placed underneath.
- Test the devices. Place the assembled vane and anemometer on the outdoor surface. Gently blow on the arrow to see it align with the airflow; observe the cups spin when the wind blows.
- Record observations. Use the table below to note wind direction (the arrow points toward the source) and count cup rotations for a fixed interval (e.g., 10 seconds) to estimate speed.
What to Observe and Measure
Each observation session should include the following columns. Use a fresh sheet of paper or a spreadsheet to keep a running log.
| Date | Time (hh:mm) | Wind Direction | Rotations in 10 s | Estimated Speed (m/s) |
|---|---|---|---|---|
To estimate speed, compare the number of rotations to a simple reference: in a moderate breeze (≈5 m/s) a typical cup anemometer made from four cups makes about 2–3 rotations per second. This rough conversion can be refined later by checking a local weather service.

The Science Explained
Weather vane. Air moving across the vane exerts pressure on the broad side of the arrow. The arrow rotates until the narrow “head” points into the wind, minimizing resistance. The pivot allows the device to align itself without any external power – the wind does the work.
Cup anemometer. Each cup catches the wind on its convex side and is pushed forward. Because the cups are mounted on a cross, each cup’s push generates a torque that spins the assembly. The faster the wind, the more torque, and the higher the rotation rate. The relationship between rotation rate and wind speed is approximately linear for low speeds but becomes non‑linear at higher velocities due to aerodynamic drag and cup inertia.
Both devices are models of professional meteorological instruments. They illustrate the same physical principles (airflow, pressure, torque) but are not calibrated for precise measurements. The weather vane reliably shows direction, while the cup anemometer gives a useful “relative” sense of speed.
Troubleshooting
- Vane sticks. If the arrow does not turn freely, check that the pushpin is centered and that the eraser hole is wide enough. Lubricate the pivot lightly with a dab of soap.
- Anemometer wobble. Unequal cup placement can cause the cross to tilt. Ensure all four cups are taped at the same distance from the centre and face the same direction.
- Too much friction. Excess tape or a thick pushpin can add resistance. Use a thin drawing pin and minimal tape.
- Inconsistent counts. Use a stopwatch or phone timer for exact 10‑second intervals. Practice a few trials to develop a steady rhythm.
Model Limitations
The cardboard and cup design cannot replace a calibrated anemometer. Sources of error include:
- Variable cup size and shape affect drag.
- Friction at the pivot introduces a threshold wind speed below which the cups will not turn.
- Wind gusts and turbulence cause short‑term fluctuations that are hard to capture with a simple count.
Despite these limits, the model is excellent for visualizing how wind direction and speed are measured and for encouraging systematic observation.
Next Steps
After a week of daily recordings, plot wind direction on a compass rose and graph rotations versus time of day. Compare your relative speed estimates with the official forecast from a nearby weather station. Discuss any patterns – for example, stronger afternoon breezes or prevailing winds from a particular direction – and relate them to local geography (hills, bodies of water, etc.).
Related terms
- Weather vane
- A simple instrument that rotates to point into the wind, indicating wind direction.
- Anemometer
- A device that measures wind speed, often by counting rotations of cups or blades.
- Wind direction
- The direction from which the wind originates, expressed as a compass point (N, NE, E, etc.).
- Wind speed
- The rate at which air moves horizontally, typically measured in meters per second or miles per hour.