Orientation
This activity lets children act like NASA engineers who design water‑purification systems for the International Space Station. Using a single reusable plastic bottle and common household items, learners will create a layered filter, test its ability to clear cloudy water, and iterate on the design. The project combines hands‑on construction with scientific observation, making it ideal for home, classroom, or homeschool settings.
Before You Begin
- Adult supervision: Younger children (6‑9) need help with cutting the bottle and handling scissors.
- Workspace: Set up a flat, washable surface. Keep a bowl or bucket nearby to catch filtered water.
- Safety note: The filtered water is only for visual experiments, not for drinking. As the NASA JPL activity reminds us, “no matter how ‘clean’ your filtered water looks, you should never drink it because it still may contain pollutants you can’t see.”1
Materials
| Item | Typical Quantity |
|---|---|
| 2‑L plastic soda bottle (clean and dry) | 1 |
| Scissors or utility knife | 1 pair |
| Rubber band or strong tape | 1 |
| Coffee filter or clean cheesecloth (paper‑based) | 1‑2 pieces |
| Fine sand (play sand works) | ½ cup |
| Coarse sand or small gravel | ½ cup |
| Activated charcoal (or charcoal from a burnt wooden stick, crushed) | ¼ cup |
| Cotton balls or clean cotton batting | 3‑4 pieces |
| Clear container for the filtered water | 1 |
| Dirty water sample (tap water with a pinch of soil or food coloring) | ≈1 L |
All items are commonly found at home, in a garden store, or in a kitchen pantry. If you lack activated charcoal, you can skip that layer and note the effect in the observations.
Steps
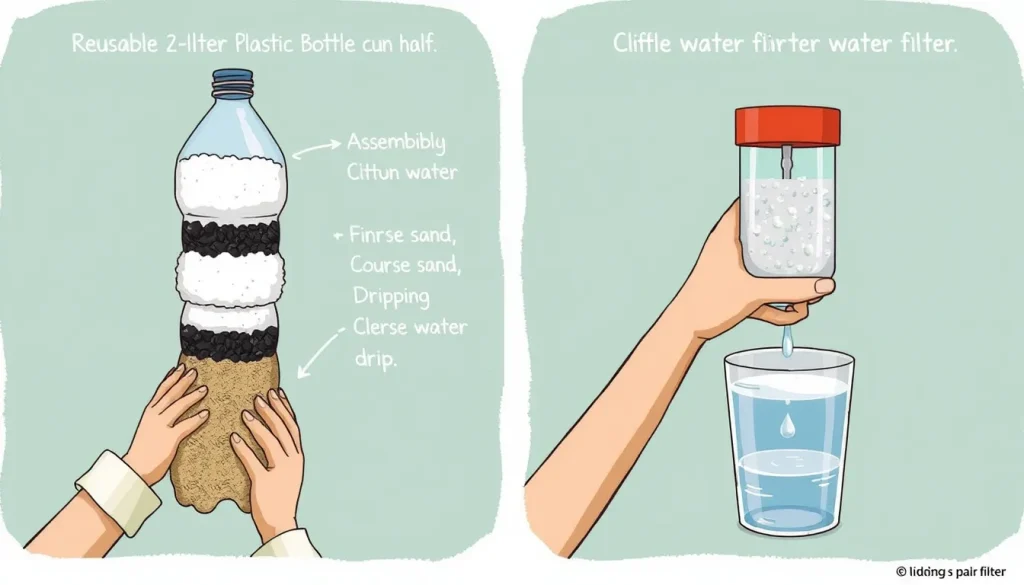
- Prepare the bottle: Using scissors, cut off the bottom third of the plastic bottle. Keep the top part (the neck and mouth) – this will be the filter housing.
- Secure the filter base: Place a coffee filter or a piece of cheesecloth over the bottle’s mouth and secure it with a rubber band. This prevents the filter media from falling out.
- Layer the media (bottom to top):
- First layer – cotton balls: push 3‑4 cotton balls into the mouth so they sit against the filter paper.
- Second layer – activated charcoal: add the crushed charcoal (≈¼ cup). Charcoal adsorbs many dissolved impurities.
- Third layer – fine sand: pour the fine sand over the charcoal. This traps small particles.
- Fourth layer – coarse sand or gravel: top it with the coarse sand or small gravel to catch larger debris and keep the finer layers from shifting.
- Seal the bottle: If the bottle’s cut edge is jagged, tape it with strong tape to avoid leaks. The top (neck) remains open for pouring.
- Test the filter: Place the bottle upside‑down (mouth down) into the clear collection container. Slowly pour the dirty water into the top of the bottle. Observe how the water drips through each layer into the collection container.
- Record observations: Note the time it takes for 100 mL of water to pass, the clarity of the filtered water, and any leaks or blockages.
- Iterate (optional): If the water is still cloudy, try adding another layer of charcoal or increasing the sand thickness. Record any changes.
Design Constraints and Success Criteria
- Constraints:
- Only one reusable plastic bottle may be used as the filter housing.
- All additional materials must be everyday household items.
- The filter must not leak while water passes through.
- Success criteria:
- Water collected in the container is visibly clearer than the original sample (reduced cloudiness).
- At least 100 mL of water can be filtered in under 5 minutes.
- The filter remains intact after the test (no broken layers or bottle rupture).
What to Observe or Measure
| Trial | Start Time | Volume Filtered (mL) | Time Elapsed (s) | Clarity Rating (1‑5) | Notes (leaks, clogs) |
|---|---|---|---|---|---|
| 1 | |||||
| 2 | |||||
| 3 |
Clarity Rating: 1 = very cloudy, 5 = almost clear.
The Science Explained
Filtration works by passing water through porous materials that trap particles based on size. In this design:
- Cotton catches the largest debris (e.g., bits of paper).
- Coarse sand or gravel removes medium‑sized particles.
- Fine sand filters out small particles that passed the previous layer.
- Activated charcoal does more than physical trapping; its porous surface adsorbs dissolved substances and some chemicals, improving taste and color.
The order of layers matters: larger‑pore media on top protects the finer media below from clogging too quickly. This principle mirrors real‑world water‑purification systems used on the International Space Station, where engineers stack materials to achieve both mechanical filtration and chemical adsorption.1
Troubleshooting
- Leak at the bottle’s cut edge: Apply extra tape or use a silicone sealant (adult‑only).
- Water drips too slowly: The sand may be packed too tightly. Loosen the sand slightly or reduce the thickness of the fine‑sand layer.
- Water remains cloudy after filtering: Add another charcoal layer or increase the amount of fine sand. Ensure the cotton filter at the mouth is not saturated.
- Filter clogs after a few minutes: Replace the top layer of sand with fresh material, or design a removable tray for easy cleaning.
Try Another Version
Once the basic filter works, challenge learners to modify the design and ask new questions, such as:
- What happens if you replace sand with small pebbles?
- How does the amount of charcoal affect the color of the filtered water?
- Can a second bottle stacked on top increase filtration speed?
Each variation provides a new testable question and an opportunity to record comparative data.
Cleanup and Disposal
Dispose of the used sand and charcoal in the garden compost (if organic) or in the trash if not reusable. Rinse the plastic bottle and reuse it for future experiments. Wash hands after handling the dirty water.
Next Steps
Encourage students to explore other water‑treatment methods, such as solar disinfection (SODIS) or membrane filtration using coffee‑filter paper alone. Connecting the filter to a simple water‑wheel model can also illustrate how flowing water can generate mechanical energy.
Related terms
- Filtration
- A process that separates solid particles from a fluid by passing the fluid through a porous material.
- Adsorption
- The adhesion of molecules from a liquid or gas to a solid surface; activated charcoal uses adsorption to remove impurities.
- Turbidity
- A measure of how clear or cloudy a liquid is; higher turbidity means more suspended particles.
Sources & references
- NASA JPL Education, “Make a Water Filter – Engineering Project,” https://www.jpl.nasa.gov/edu/resources/project/make-a-water-filter/ (accessed Oct. 26, 2026)